Let’s talk about ski foot pain. Ski boots can definitely put stress on the ankles, shins, and arches, but it’s not inherent to the design. Most often, it comes down to improper fit. Let’s be honest, this kind of pain can make anyone (even snowboarders) wince a little. and beginners question the entire sport. But trust me, a good ski boot is out there, and when you find it, it’s magic! By the end of this post, I’m confident that my fellow skiers will have all the information they need to take their ski boot comfort to the next level. No more sore feet or blisters – just pure bliss on the mountain.
1. Poor Fit:
Alright, let’s talk about ski boot fit. It’s no secret this can be a nightmare compared to grabbing a pair of shoes. There’s just so much more boot cradling your foot, and a tiny mistake can make a huge difference. So, what should it feel like when you try them on?
First things first, toes. This is how you know you’ve got the right size. Stand tall and push your toes all the way forward. Your big toe should just barely brush the front of the boot. You want them as close as possible for good energy transfer to your bindings and skis.
Next comes the ball of your foot, the widest part. If the boot feels pinchy here, it’s too narrow. Same goes for side-to-side movement. Different brands have different widths, so finding the perfect fit is crucial.
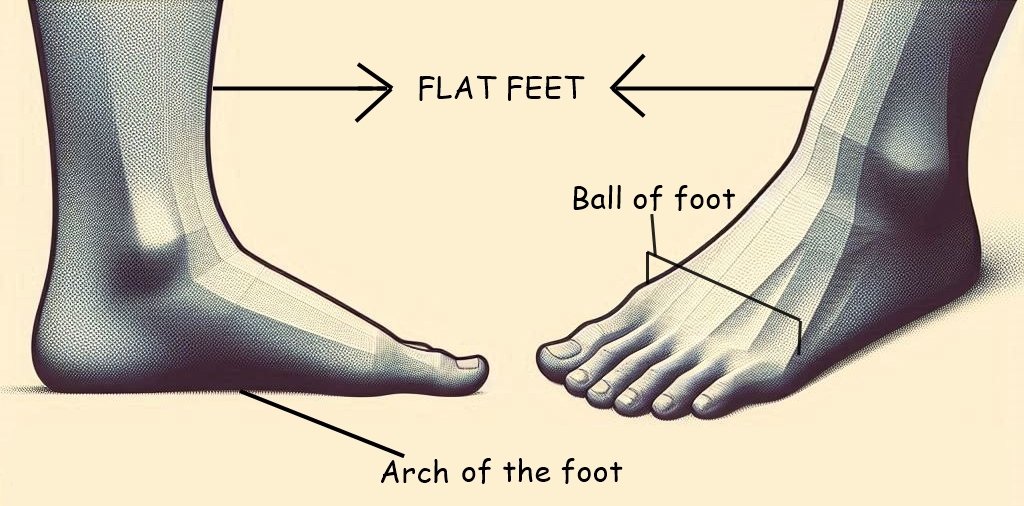
Now, the arch. This is a fairly common problem. Much, much more common in people with a flat feet. I am a flat footed skier myself. And the pain can be severe. A cramping and aching sensation would develop, in the arch of my foot. This really comes from the muscles overworking themselves in the arch of the foot. When we make a ski turn, what happens is that we move our knee in, that hits the top of the boot and takes the ski onto the inside the edge and you carve a turn. However, if your foot is unstable, you have to work much harder to get that edge and carve that turn.
When a person with a flat feet tries to turn, they have to use muscles in the arch of the foot excessively. Those muscles get over-worked and they become unbearably painful sometimes. There is a couple of techniques to try to solve this problem:
Number one is to use a proper type of orthotic device. (A curved sole for the inside of a boot, also known as foot bed). For people with a severe flat foot, you really need a very controlling orthotic. One that has a flange that comes around the inside of the arch of the foot. So, it really curves up around there and it has to confirm extremely tight to the arch of the foot. If it doesn’t, the foot is going to be collapse and then you will get those muscles firing and get that pain. So, that is the first thing we do. A controlling foot bed inside the boot.
Does the footbed hug your arch comfortably? Remember, the sole gets compressed over time. A slightly high arch initially is actually better, because it will mold to your foot for perfect support. Flat arches lead to major discomfort as your feet sag throughout the day. But be careful, too much arch can cause painful pressure.
The heel is key too. No side-to-side play, no lifting up, and definitely no pinching. If any of those are happening, keep looking.
The fit around your ankle bone, the malleolus, matters a lot. Too loose, and your heel will slip when you lean forward, plus your whole foot can slide into the boot, leading to bruised toes. Too tight, and you’ll lose circulation, get numb feet, and putting them on will be a battle. Aim for a snug, comfortable pressure all around, secure but pain-free.
Finally, the shin and calf. They should feel snug without pinching or cutting off circulation. It’s tempting to leave extra space here if you’ve had shin pain before, but that allows for more impact and vibration. A snug fit is always better. Shin pain despite a good lower leg fit? We’ll talk about that next – it’s likely a flex issue.
2. Wrong Flex:
Ski boots come in different flex ratings, which indicate how much the boot bends forward at the ankle. I used to deal with that all the time until I figured out the whole flex rating thing. Here’s the deal:
Beginners need a softer flex for easier maneuverability, while advanced skiers might prefer a stiffer flex for more control.
Flex rating basically tells you how stiff the boot is – how much bend you get in the tongue when you push your shins forward. Lower numbers mean more flex (easier to bend), higher numbers mean stiffer.
Now, you might think a super stiff boot would be best, but that’s not always true. Too stiff and it feels like hitting a brick wall every time you bend your knees. But a boot that’s too soft lets your shins go way too forward, then bam! Feels like you hit a wall anyway when the boot finally runs out of flex.
The ideal boot should give a little resistance when you lean forward, stopping you smoothly without letting your shins go crazy. Makes sense, right?
So, what flex rating is right for you? Here’s what I consider:
- My Skiing Style: Beginners and chill skiers like me should stick to the lower end of the recommended range for our height and weight. Intermediate and laid-back experts can aim for the middle. If you’re an ambitious skier tackling tough terrain, go near the top of your range.
- My Height: Taller folks (like me, maybe?) should actually go for a slightly stiffer boot (10-20 points higher flex). Extra height gives you more leverage, so the boot feels softer. Shorties, on the other hand, might need a softer boot (10-20 points lower) because their height makes the boot feel stiffer.
- My Weight: Heavier skiers should also consider a stiffer boot (10-20 points higher). More weight means more momentum, so the boot feels softer. Lighter folks might need a softer boot (10-20 points lower) since they have less momentum to push against the boot’s stiffness.
Remember, this is just a starting point. The best way to find your perfect flex is to try on boots and see how they feel. But hopefully, this info helps you avoid that brick wall feeling on your shins next time you hit the slopes!
3. Pressure and Trigger Points
Ugh, pressure points! You know the feeling – boots that seem perfect except for that one tiny spot that starts throbbing by afternoon. Listen, if you’ve got new boots, there’s no need to suffer! Most modern boots are built to be customizable. They might have heat-moldable liners or let you add custom footbeds for better fit. Plus, many shops offer “punching out” specific problem areas to relieve pressure.
But what if your boots are older and that one spot has been your nemesis for years? Yeah, it’s probably time for an upgrade. New boots with better customization options can be a game-changer for your feet (and your enjoyment on the slopes!).
4. Worn-out Liners
Dude, ever get that feeling after a day on the slopes where your feet just ache something awful? You might be dealing with packed-out liners. These bad boys are your boot’s inner layer, and over time, all that skiing compresses them, making them flat and hard. It happens so slowly you barely notice, but trust me, once you slip into a new pair of boots, you’ll realize what you’ve been missing!
Here’s how to know if your liners are toast:
- Throbbing Insteps: Feeling pain in the top of your foot after some bumps? That could be a sign your liners aren’t absorbing impact as well as they used to.
- Burning Arches: Do your arches feel like they’re on fire after a day of skiing? Packed-out liners might not be providing the arch support you need.
- General Foot Pain: Look, if your boots are old and your feet usually hurt after skiing, the culprit is probably worn-out liners.
Not ready to ditch the whole boot yet? No worries! A new custom insole can often do the trick by adding support and comfort where your old liners just can’t anymore.
5. Proper Buckling
As someone who’s spent a lot of time on the slopes, I can’t stress enough the importance of proper boot buckling. Here’s my routine to ensure a comfortable and pain-free day:
- Warm Up the Boot: Resist the urge to crank the buckles down right away. Give your foot five minutes to warm the liner, making it more pliable and easier to conform to your foot. While you wait, wiggle your toes and shift your foot slightly to find the perfect position.
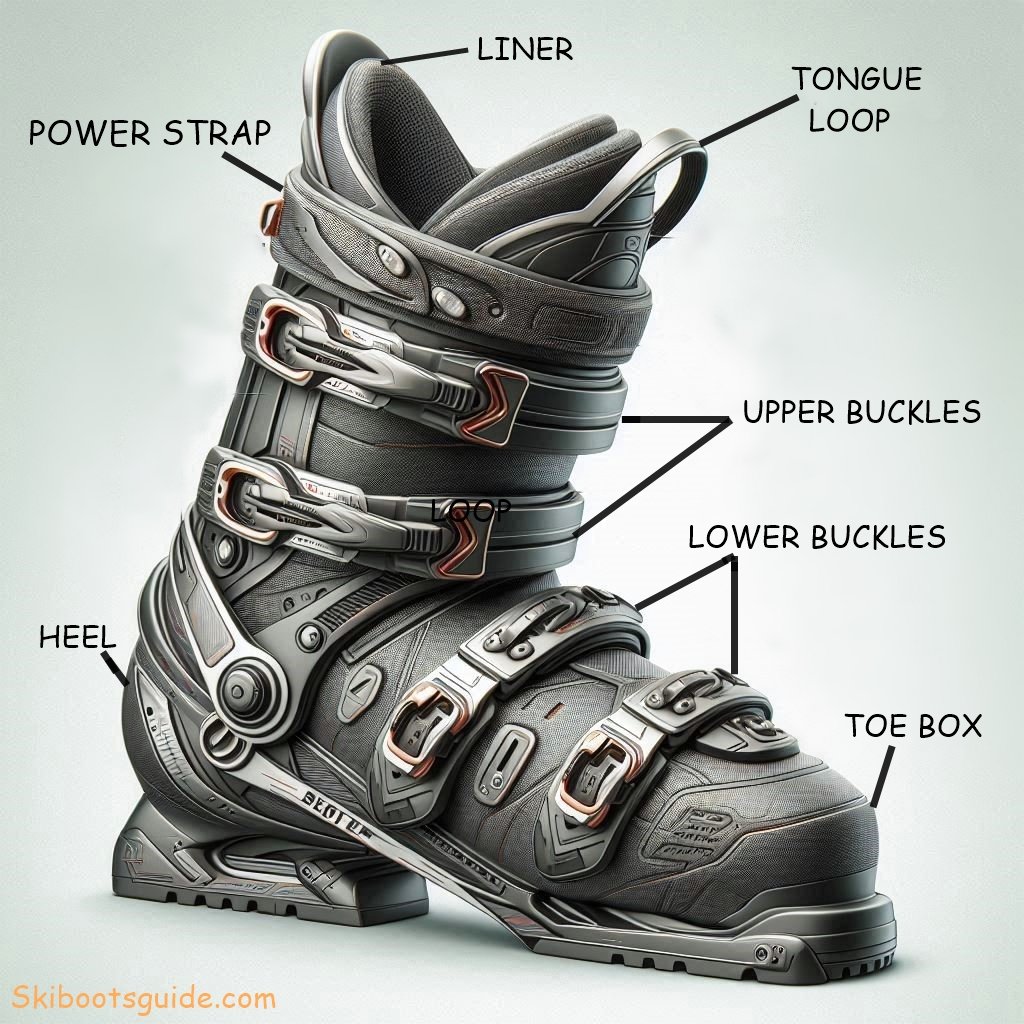
- Top-Down Buckling: Once the boot feels warm and your foot is settled, start buckling from the top buckle down. This creates a progressive tightening effect.
- Heel Seat: With the top buckles secured, lean your shins forward into the boot’s tongue while simultaneously pushing your heel back. This ensures a snug fit that won’t lift up as you ski.
- Foot and Toe Buckles: Now that your heel is secure, tighten the buckles around your midfoot and toes. Finish by adjusting the power strap.
- Fit Check: Your foot should feel locked in with just a hint of wiggle room in your toes. There should be absolutely no pain, throbbing, or pinching.
- Fine Tuning: Do a couple of warm-up runs and then re-evaluate the tightness. You might need to make minor adjustments throughout the day, especially if the boot starts to pack out slightly. However, resist the urge to loosen them constantly. Looser boots feel good initially, but they lead to increased vibration and impact in the boot, ultimately causing more foot pain.
- Over-Tightening: On the other hand, if you find yourself constantly loosening your boots on the lift, you might be buckling them too tight from the start. Experiment with a slightly looser setting to find the sweet spot between comfort and control.
By following these steps, you can ensure your boots are buckled properly for a pain-free and enjoyable day on the slopes. Remember, a little effort in the beginning can save you a lot of discomfort later!
